A few days ago I migrated my blog from a Laravel application to Jekyll. Furthermore, the application is now hosted on GitHub Pages.
In this post I describe the advantages of using Jekyll and GitHub Pages in comparison to traditional content management systems. We build our own Jekyll blog and launch it via GitHub Pages. At the end I demonstrate how to configure your 1&1 domain to point to the GitHub Page.
Content
Advantages of using Jekyll and GitHub Pages
The combination of Jekyll and GitHub Pages has, in my opinion, decisive advantages over traditional content management systems:
-
A bunch of freely available themes
Whether it’s a business page, a blog or an online business card, there is a dedicated Jekyll theme.
-
Markdown support
Pages can be created not only with HTML but also with Markdown. Markdown is much easier to write and read.
-
Decreased server load by just using static HTML
Jekyll takes over the entire asset handling and build process of your page. It converts the markdown files to static HTML. No dynamic content generation.
-
Hosting on GitHub
GitHub takes care of hosting your website. You do not have to pay for a webspace.
-
Git
Additionally, the entire range of git features can be used. You get a complete version control out of the box. For me, this was one of the main reasons for using GitHub Pages. I own a shared hosting package from 1&1 and can access the server only via FTP. Changes had to be made by copying files back and forth. With the new setup, adjustments can simply be deployed by pushing them to the remote repository.
-
No database
Jekyll does not have a database, which was another main reason for me to use it. This increases the loading speed and makes the site more secure.
Build a blog
Enough theory! Let’s get started! There are several ways to create a Jekyll blog. For example, you could install Jekyll locally on your computer and create the blog from scratch. However, it is much easier and faster to use an existing starting point and build up on it. This is the way we will create our application throughout this blog post.
Fork a theme
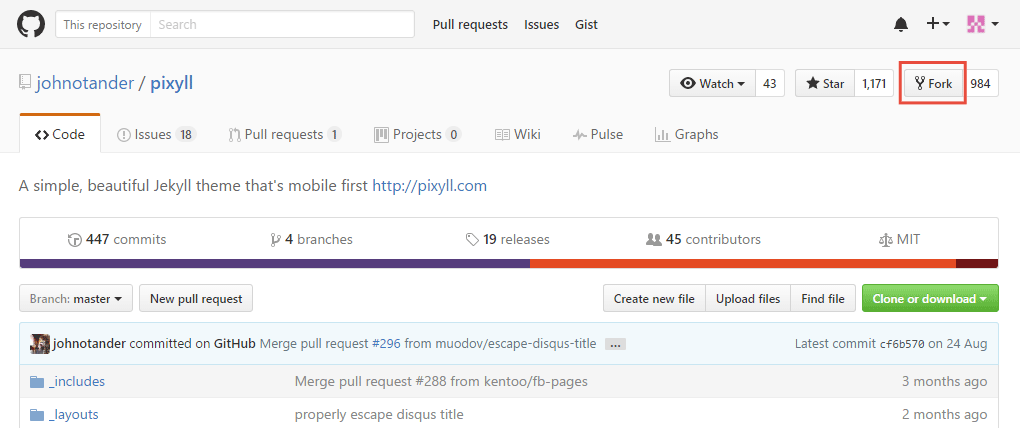
To find a starting point, I recommend http://jekyllthemes.org/. This site contains a lot of different themes for any kind of application. All themes are freely available on GitHub. For our purposes we choose Pixyll and open its GitHub-Repository.
To add the current Pixyll state to your repositories, click on Fork in the top right corner of your screen.
Hosting on GitHub Pages
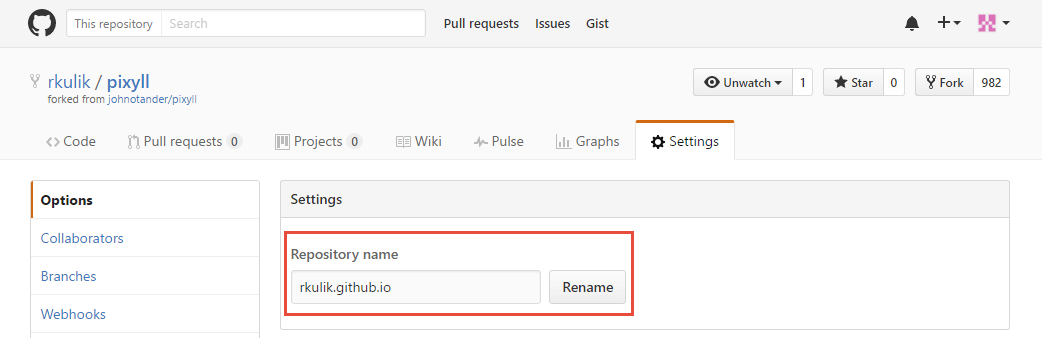
As a GitHub user you have the opportunity to host one website on GitHub. Therefore you just have to rename one of your repositories to your-username.github.io (your-username has to be replaced by your GitHub username). Go to the Settings section of the forked blog theme and rename it.
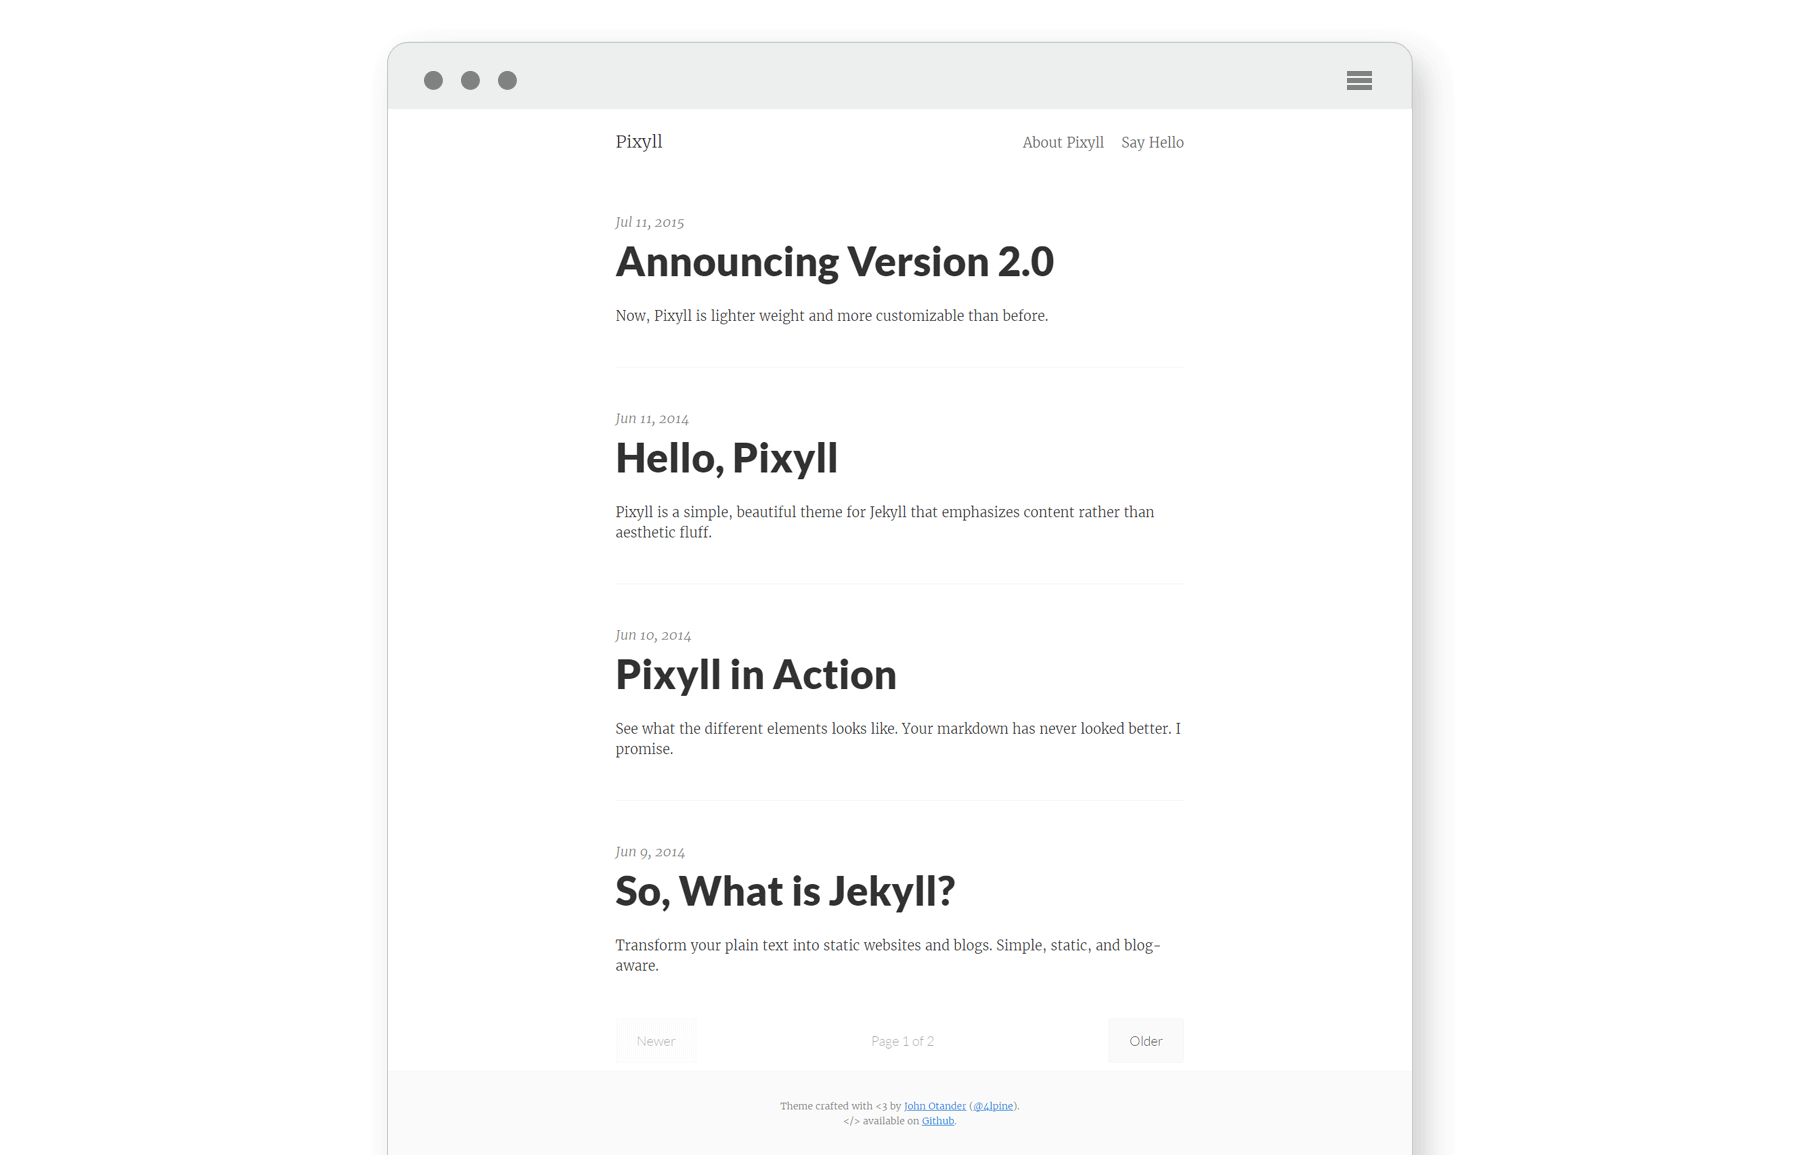
The site is shown on http://your-username.github.io and should look like on the following screenshot (in certain circumstances it can take some time until the site is available online).
Configure domain
The first milestone is reached, the blog is online. Now we have to make sure the page is callable via our own domain. As mentioned above, I have a 1&1 shared hosting package including my domain. The following configurations refer to the 1&1 Control-Center, but should be similar to other hosters.
Adjust CNAME file
Before we deal with the 1&1 domain configuration, we have to make one change in our repository. To ensure your-username.github.io forwards to our private domain, we have to enter the domain (e.g.: www.renekulik.de) into the CNAME file in the root directory.
Create subdomain
Our private 1&1 domain should point to the GitHub repository and deliver the GitHub Page. To connect the domain with a third party service such as GitHub, we need a appropriate CNAME entry. As 1&1 only supports CNAME for subdomains, we have to create a subdomain first. Sign in to your 1&1 Control-Center and go the Domains verwalten section. Click on Subdomain anlegen beside the domain which should display the blog.

Enter www as prefix for your subdomain and click Subdomain anlegen.

Go back to the domain overview and click on Subdomains verwalten.

Click on DNS-Einstellungen bearbeiten beside the just created subdomain.
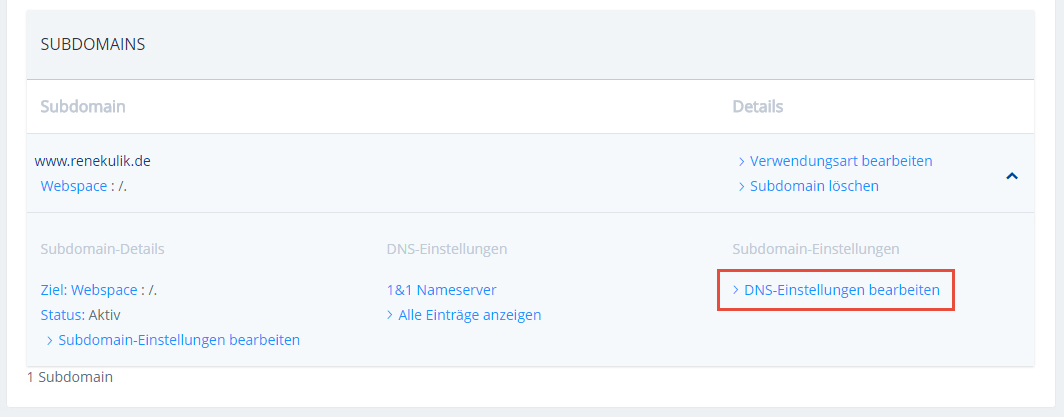
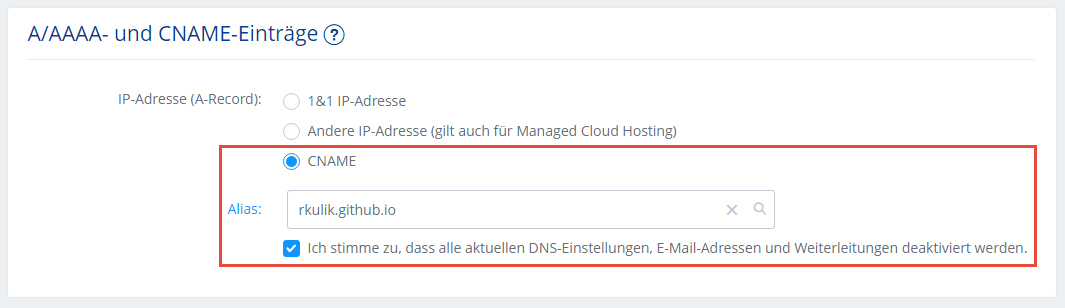
Choose the option CNAME for you IP-address and enter the URL of your GitHub Pages as alias (your-username.github.io). Accept the changes and save the settings.
Set up forwarding
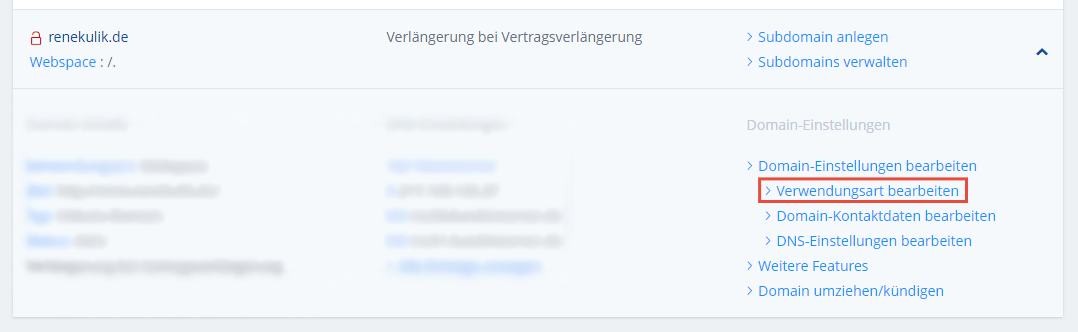
As the last step, the root domain should deliver our GitHub Page as well. Therefore, we set up a forwarding which redirects from the root domain to the subdomain. Click Verwendungsart bearbeiten on the domain overview.
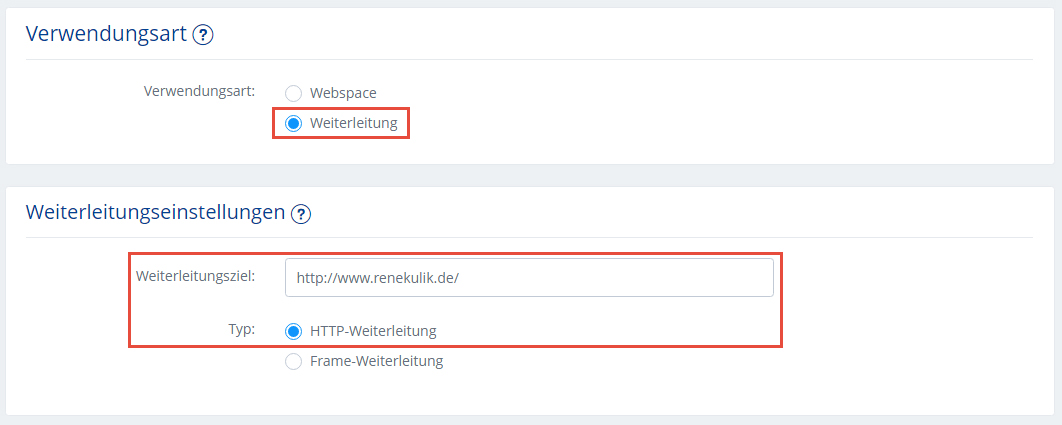
Choose Weiterleitung as usage and select HTTP-Weiterleitung as destination. Hit save afterwards.
Awesome, that’s it! The Jekyll blog is online and reachable via your 1&1 domain.
Conclusion
The transition to Jekyll and GitHub Pages was definitely the right decision. For far too long I have restricted myself by the FTP server and the unnecessary database. Maintaining my site has become much easier and faster.
For the sake of fairness it must be said that Jekyll is not the right choice for every kind of website. As there are no databases and serverside processing, complex applications with a high amount of user interaction should be implemented by using other tools.
Definitely check out Jekyll for creating simple, minimalistic websites!